Blog Layout

The Importance of Timely Water Damage Restoration

Apr 22, 2024

Addressing Water Damage: Essential Tips from London Drywallers

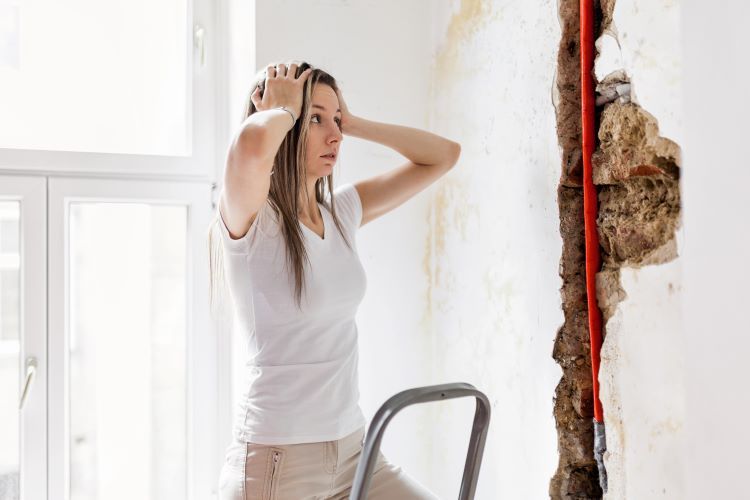
Water damage can wreak havoc on your home, causing not only structural issues but also potential health hazards if left untreated. As trusted professionals in the drywall industry, London Drywallers understands the importance of addressing water damage promptly and effectively. In this article, we'll explore the common causes of water damage and why it's crucial to have it repaired in a timely manner.


Common Causes of Water Damage:

  1. Leaky Plumbing: One of the most common causes of water damage is leaky plumbing, including burst pipes, dripping faucets, and malfunctioning appliances like dishwashers and washing machines.
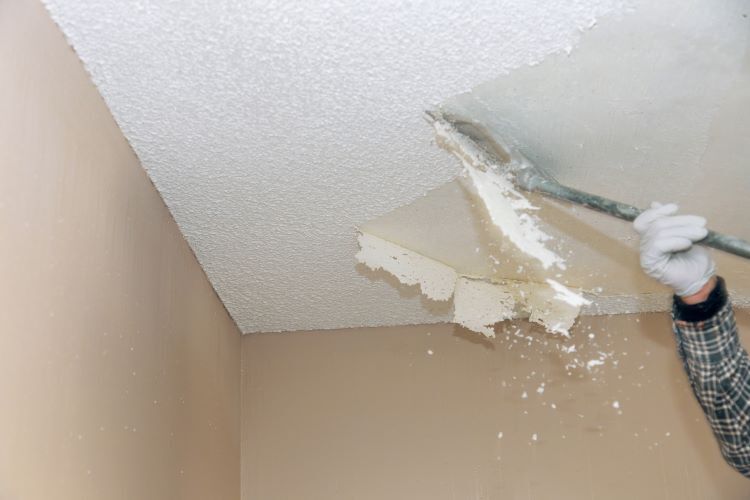
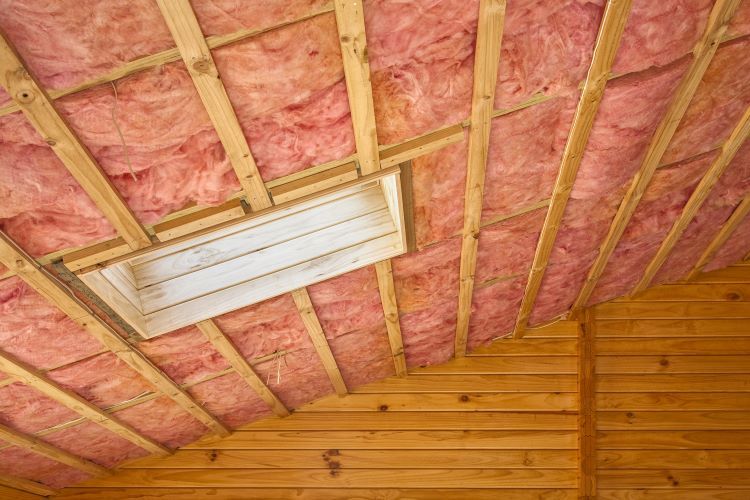
  2. Roof Leaks: Damaged or improperly installed roofing materials can allow water to seep into your home, leading to water damage in the ceilings, walls, and attic spaces.
  3. Poor Drainage: Improper drainage around the foundation of your home can result in water pooling near the structure, which can eventually find its way into your basement or crawl space.
  4. Flooding: Natural disasters such as heavy rainstorms, hurricanes, or snowmelt can cause flooding, leading to significant water damage to your property.
  5. Condensation: Excessive condensation buildup on windows, walls, or pipes can lead to water damage over time, especially in areas with poor ventilation.


Importance of Timely Repair:

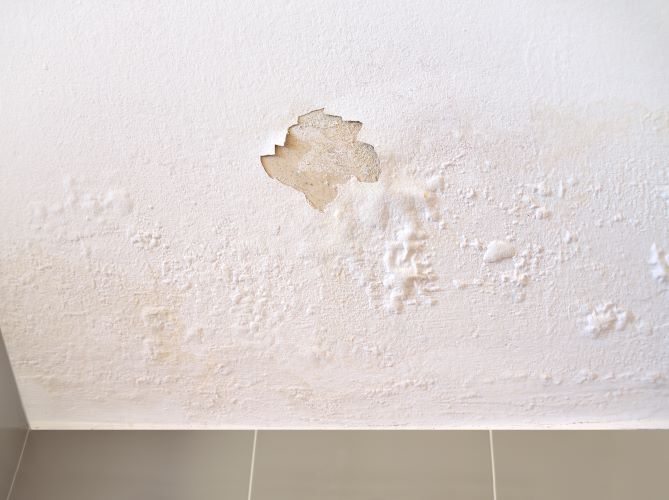
  1. Prevent Mold Growth: Water damage creates the perfect breeding ground for mold and mildew, which can pose serious health risks to you and your family. Timely repair helps prevent mold growth and ensures a safe and healthy living environment.
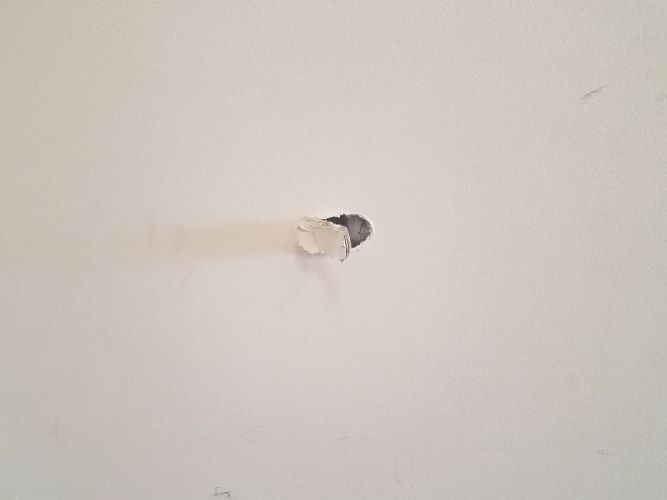
  2. Preserve Structural Integrity: Water damage can compromise the structural integrity of your home, weakening the foundation, walls, and ceilings. Prompt repair helps prevent further deterioration and costly structural repairs down the line.
  3. Protect Personal Belongings: Water damage can destroy furniture, electronics, clothing, and other personal belongings. Quick action can help salvage items and minimize losses.
  4. Reduce Restoration Costs: The longer water damage is left untreated, the more extensive the damage becomes, leading to higher restoration costs. Timely repair can help minimize repair expenses and prevent the need for extensive renovations.
  5. Maintain Property Value: Water damage can significantly decrease the value of your home and deter potential buyers. Timely repair ensures that your property maintains its value and appeal on the real estate market.


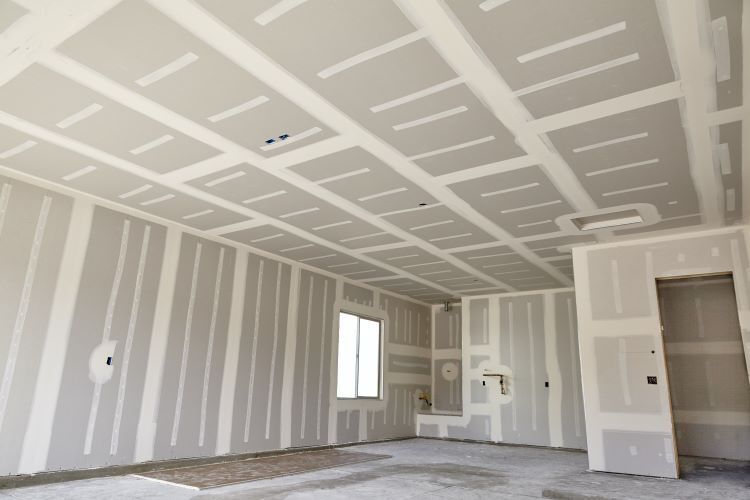
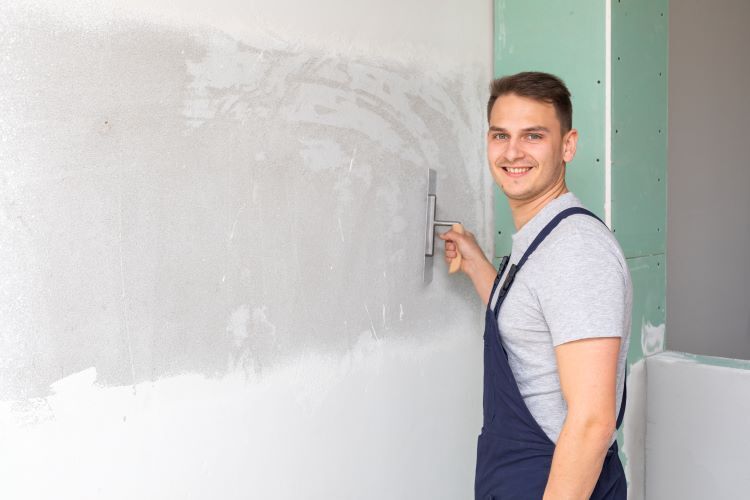
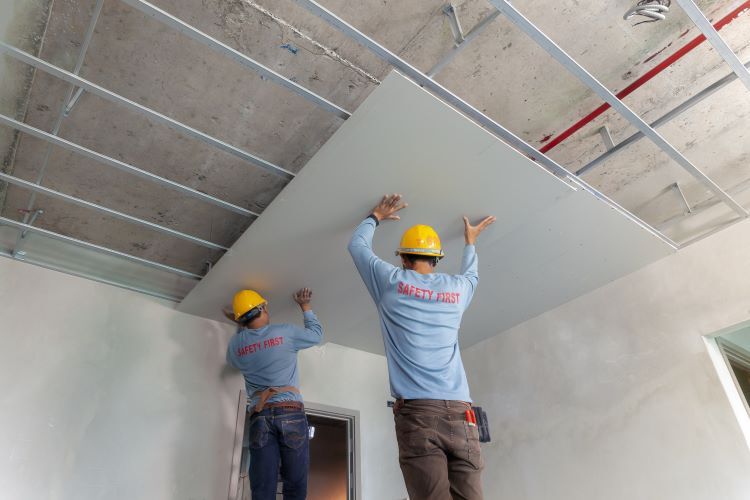
At London Drywallers, we specialize in water damage repair and restoration services to help homeowners in London, Ontario, protect their investment and ensure the safety and comfort of their families. Our team of experienced professionals is equipped with the knowledge, skills, and tools to assess the extent of the damage and implement effective solutions to restore your home to its pre-damage condition. Don't wait until it's too late—contact London Drywallers today for expert water damage repair services you can trust.

15 May, 2024
When it comes to achieving a smooth and seamless finish on your drywall surfaces, mudding plays a crucial role. As one of the final steps in the drywall installation process, mudding, also known as taping and finishing, involves filling in joints, seams, and imperfections to create a flawless surface ready for painting or wallpapering. In this article, we'll explore the purpose of mudding and why it's an essential step in the drywall finishing process. 1. Seam Concealment: One of the primary purposes of mudding is to conceal the seams and joints between drywall panels. Even with careful installation, there will inevitably be gaps and irregularities that need to be filled and smoothed out. Mudding allows drywall installers to create a seamless transition between panels, ensuring that the finished surface appears uniform and professional. 2. Structural Integrity: In addition to providing a smooth surface, mudding also helps to reinforce the structural integrity of the drywall. By filling in gaps and seams with joint compound, mudding strengthens the connections between panels, preventing cracks and reducing the risk of future damage. This is especially important in high-traffic areas or areas prone to movement, such as ceilings and corners. 3. Aesthetic Appeal: Mudding plays a significant role in enhancing the aesthetic appeal of your walls and ceilings. Once the seams and joints have been filled and smoothed out, the surface is ready for paint or wallpaper application. A well-mudded surface provides a clean and professional-looking finish, free of visible seams or imperfections. Whether you're painting your walls a bold color or applying a subtle wallpaper pattern, mudding ensures that the final result is visually pleasing. 4. Moisture Resistance: Properly mudding your drywall also helps to improve its moisture resistance. Joint compound acts as a barrier, preventing moisture from seeping into the seams and causing damage to the drywall material. This is particularly important in areas such as bathrooms, kitchens, and basements, where moisture levels may be higher and the risk of water damage is increased. 5. Longevity: Lastly, mudding helps to prolong the lifespan of your drywall by protecting it from wear and tear. By filling in gaps and reinforcing seams, mudding helps to prevent cracks, dents, and other forms of damage that can occur over time. This ensures that your walls and ceilings maintain their integrity and appearance for years to come, reducing the need for costly repairs or replacements down the line. In conclusion, mudding is a critical step in the drywall finishing process that serves multiple purposes. From concealing seams and joints to enhancing structural integrity and moisture resistance, mudding plays a vital role in creating smooth, durable, and visually appealing surfaces. As experienced professionals at London Drywallers, we understand the importance of proper mudding techniques and take pride in delivering flawless results on every project. Contact us today to learn more about our drywall installation and finishing services!
13 May, 2024
When it comes to drywall installation , repair , or finishing , many homeowners in London, Ontario may consider taking the do-it-yourself route to save a few dollars. However, entrusting your drywall needs to a professional drywall company like London Drywallers can offer numerous benefits that outweigh the initial cost savings. In this article, we'll explore the advantages of hiring a professional for all your drywall needs . 1. Expertise and Experience: Professional drywall companies have years of experience and expertise in handling various drywall projects, from simple repairs to complex installations. They possess the necessary skills, knowledge, and techniques to ensure high-quality results and seamless finishes. By hiring professionals, you can avoid common pitfalls and mistakes that inexperienced DIYers may encounter. 2. Quality Workmanship: One of the primary benefits of hiring a professional drywall company is the assurance of superior workmanship. Professionals use high-quality materials, tools, and techniques to deliver flawless results that enhance the aesthetics and functionality of your space. Whether it's achieving smooth finishes, precise cornering, or seamless repairs, professionals take pride in their craft and strive for perfection. 3. Time and Efficiency: Professional drywall contractors have the experience and manpower to efficiently complete projects within the specified timeframe. They follow streamlined processes and utilize efficient techniques to minimize downtime and disruptions to your daily life. By entrusting your drywall needs to professionals, you can save valuable time and avoid the hassle of prolonged DIY projects. 4. Cost-Effectiveness: While hiring a professional drywall company may seem like an added expense, it can actually save you money in the long run. Professionals have access to wholesale materials and equipment, allowing them to procure supplies at lower costs compared to retail prices. Moreover, their efficient workmanship and attention to detail can prevent costly mistakes and rework down the line. 5. Safety and Liability: Drywall installation and repair can pose safety risks, especially when working with heavy materials and specialized tools. Professional drywall companies prioritize safety protocols and adhere to industry standards to minimize the risk of accidents or injuries on the job site. Additionally, hiring a licensed and insured company protects you from liability in the event of property damage or injuries. 6. Peace of Mind: Perhaps the most significant benefit of hiring a professional drywall company is the peace of mind it provides. Knowing that your project is in capable hands and will be completed to the highest standards allows you to relax and focus on other aspects of your home improvement project. With professionals handling your drywall needs, you can rest assured that the results will exceed your expectations. In conclusion, hiring a professional drywall company like London Drywallers offers numerous benefits, including expertise, quality workmanship, efficiency, cost-effectiveness, safety, and peace of mind. Whether you're renovating your home, building a new construction, or simply need drywall repairs, entrusting the job to professionals ensures a smooth and successful outcome. With their commitment to excellence and customer satisfaction, London Drywallers is your trusted partner for all your drywall needs in London, Ontario.
11 May, 2024
Drywall installation is a crucial step in creating smooth, seamless walls and ceilings in any residential or commercial space. As seasoned professionals at London Drywallers in London, Ontario, we understand the intricacies of drywall installation and are here to share some expert tips and tricks to help you achieve flawless results. 1. Proper Planning and Preparation: Before beginning any drywall installation project, it's essential to carefully plan and prepare the area. This includes measuring and marking the location of electrical outlets, switches, and any other fixtures on the walls. Additionally, ensure that all necessary tools and materials are readily available to streamline the installation process. 2. Use the Right Tools: Having the right tools on hand is key to achieving professional-quality results. Invest in high-quality drywall knives, taping tools, and sanding equipment to ensure smooth, uniform finishes. A drywall lift or hoist can also be invaluable for lifting and positioning heavy sheets of drywall, especially when working on ceilings. 3. Cut with Precision: Accurate cutting of drywall sheets is essential for achieving tight, seamless joints. Use a sharp utility knife and a straightedge to score the drywall along the desired cutting line, then snap the sheet along the score line. Finish any remaining paper backing with the utility knife to create clean, precise cuts. 4. Mind the Seams: Properly taping and mudding the seams between drywall sheets is crucial for achieving a smooth, seamless finish. Apply a thin layer of joint compound along the seams using a drywall knife, then embed drywall tape into the compound and smooth out any air bubbles or wrinkles. Once dry, apply additional coats of joint compound, feathering the edges outward with each coat to blend seamlessly with the surrounding drywall. 5. Take Care with Corners: Inside and outside corners require special attention during drywall installation to ensure clean, crisp lines. Use metal or plastic corner bead to reinforce and protect the corners, then apply joint compound evenly along the bead with a drywall knife. Feather the edges of the compound outward to create smooth transitions between the corner and the adjacent walls. 6. Sand Smooth: Once the joint compound has dried completely, sand the surface smooth using fine-grit sandpaper or a sanding sponge. Take care to feather out any rough edges or high spots to create a seamless finish that's ready for priming and painting. 7. Practice Patience: Drywall installation requires patience and attention to detail. Take your time to ensure each step is done correctly, and don't rush through the finishing process. Properly installed and finished drywall will provide a durable, attractive surface that will stand the test of time. Conclusion: By following these expert tips and tricks, you can achieve professional-quality results with your drywall installation projects. However, if you prefer to leave it to the professionals, our team at London Drywallers is here to help. Contact us today for all your drywall installation needs in London, Ontario, and surrounding areas.
10 May, 2024
Drywall is a ubiquitous building material known for its versatility and ease of installation. However, like any construction material, it's not immune to issues that can arise over time. In this article, we'll explore some of the common drywall issues faced by homeowners and provide practical solutions to address them. 1. Drywall Cracks: One of the most common issues with drywall is cracking, which can occur due to various factors such as settling of the foundation, temperature fluctuations, or poor installation techniques. To address drywall cracks , start by identifying the underlying cause. If the cracks are small and superficial, they can be easily repaired using joint compound and mesh tape. For larger or recurring cracks, it may be necessary to investigate and address structural issues before repairing the drywall. 2. Nail Pops: Nail pops occur when the drywall nails or screws become loose and push through the surface of the drywall, creating unsightly bumps or indentations. To fix nail pops, first, remove the loose fastener and replace it with a new one, making sure to drive it flush with the surface of the drywall. Then, cover the area with joint compound, feathering the edges to blend with the surrounding surface. Once the compound is dry, sand the area smooth and apply a fresh coat of paint. 3. Water Damage: Water damage is a significant concern for drywall, as it can lead to mold growth, warping, and deterioration of the material. If you notice signs of water damage such as discoloration, swelling, or softening of the drywall, it's essential to address the issue promptly. Start by identifying and repairing the source of the water intrusion, whether it's a leaky roof, plumbing issue, or moisture seeping in from the exterior. Once the source is fixed, remove any damaged drywall and replace it with new material. Be sure to thoroughly dry the affected area before installing new drywall to prevent mold growth. 4. Poor Finishing: Improper finishing techniques can result in visible seams, ridges, or uneven texture on the surface of the drywall. To achieve a smooth and seamless finish, it's essential to use high-quality joint compound and apply it evenly over the joints and screw indentations. Sand the dried compound smooth between coats and feather the edges to blend with the surrounding surface. Additionally, proper sanding and priming before painting can help achieve a professional-looking finish. 5. Sagging or Bulging Drywall: Sagging or bulging drywall is often caused by inadequate support or moisture damage. To address this issue, start by reinforcing the affected area with additional screws or drywall adhesive to provide extra support. If moisture is the culprit, identify and fix the source of the moisture before repairing the drywall. Once the underlying issue is resolved, carefully cut out the damaged section of drywall and replace it with new material, ensuring proper support and attachment. Conclusion: While drywall is a durable and versatile building material, it can still experience issues over time. By understanding the common drywall issues and implementing the appropriate solutions, homeowners can maintain the integrity and appearance of their drywall surfaces. London Drywallers is committed to providing expert drywall repair and installation services to address any issues you may encounter. Contact us today for reliable solutions to your drywall needs.
08 May, 2024
When it comes to drywall installation, tackling the ceiling can be one of the most challenging tasks. However, with the right techniques and process, you can achieve professional results. In this article, we'll discuss how to drywall a ceiling , covering everything from preparation to finishing touches.  1. Preparation: Before you begin, ensure that you have all the necessary tools and materials on hand. These may include drywall panels, a drywall lift or scaffold (for easier installation), screws, a drill, a drywall knife, a T-square or straightedge, joint compound, drywall tape, and sandpaper. 2. Measure and Cut Drywall Panels: Start by measuring the length and width of the ceiling to determine the size of the drywall panels needed. For easier handling, it's best to use smaller panels, such as 4x8 feet or 4x12 feet. Once you have your measurements, mark the dimensions on the drywall panels using a pencil and T-square. Then, use a drywall knife to score the front paper layer of the drywall along the marked lines. Finally, snap the drywall along the scored lines to break it cleanly. 3. Install the First Panel: Begin by installing the first drywall panel in one corner of the ceiling, ensuring that the tapered edges face outward. Use a drywall lift or scaffold to hold the panel in place while you screw it into the ceiling joists. Drive drywall screws every 6 inches along the edges of the panel and every 12 inches in the center. Be sure to sink the screws slightly below the surface of the drywall without breaking the paper. 4. Continue Installing Panels: Once the first panel is in place, continue installing subsequent panels in rows, staggering the seams between panels to create a stronger and more uniform ceiling. To achieve a professional finish, butt the edges of the panels tightly together without leaving gaps. Use a T-square or straightedge to ensure that the panels are installed straight and level. 5. Cut and Fit Around Obstacles: For areas with obstructions such as light fixtures, vents, or electrical boxes, measure and mark the dimensions of the obstruction on the drywall panel. Then, use a drywall saw or rotary tool to carefully cut out the necessary openings. Ensure that the openings are slightly larger than the obstructions to allow for a snug fit. 6. Apply Joint Compound and Tape: Once all the drywall panels are installed, it's time to apply joint compound and drywall tape to the seams. Using a drywall knife, spread a thin layer of joint compound over each seam, covering it with drywall tape as you go. Smooth out any excess compound, ensuring that the tape is fully embedded and the seams are flush with the surrounding drywall. 7. Finish and Sand: After the joint compound has dried completely, typically overnight, apply additional coats of compound to build up the seams and feather out any uneven areas. Once the compound is dry, sand the entire ceiling surface with fine-grit sandpaper to achieve a smooth and uniform finish. Conclusion: While drywalling a ceiling may seem daunting, following these techniques and steps can help simplify the process and achieve professional results. By taking your time, ensuring proper measurements, and using quality materials, you can create a smooth and seamless ceiling that enhances the overall look and feel of your space. And if you need assistance or prefer to leave it to the experts, don't hesitate to contact London Drywallers for professional drywall installation services in London, Ontario.
06 May, 2024
Drywall plays a crucial role in the structure and appearance of our homes, providing a smooth, durable surface for interior walls and ceilings. Over time, however, wear and tear can take its toll on drywall , leading to signs of damage and deterioration. Here are some common indicators that it may be time to replace your drywall: 1. Water Damage: Water damage is one of the most common issues affecting drywall. Whether it's from a leaky roof, burst pipe, or flooding, water can cause drywall to become discolored, swollen, and soft to the touch. If you notice water stains, bulging, or peeling paint on your walls or ceilings, it's essential to address the problem promptly to prevent further damage and mold growth. 2. Cracks and Holes: Cracks and holes in drywall can occur due to various factors, including settling of the foundation, impacts, or poorly executed installations. While minor cracks can often be repaired with patching compound, extensive damage or recurring cracks may indicate underlying structural issues that require professional attention. If your drywall is riddled with cracks or has significant holes, it may be time for a replacement. 3. Mold and Mildew: Mold and mildew thrive in damp, humid environments, making bathrooms, kitchens, and basements susceptible to infestations. If you notice musty odors, visible mold growth, or signs of discoloration on your drywall, it's crucial to address the problem promptly to protect your health and prevent further damage to your home. In severe cases, mold-infested drywall may need to be removed and replaced entirely. 4. Sagging or Warping: Sagging or warping drywall can occur due to exposure to moisture, inadequate support, or improper installation techniques. If you notice areas of your drywall that appear uneven, bulging, or sagging, it's essential to investigate the underlying cause and take appropriate action. Ignoring sagging drywall can lead to structural instability and compromise the integrity of your home. 5. Outdated Appearance: As trends and design preferences evolve, the appearance of your home's interior may start to feel outdated or worn. If your drywall has an outdated texture, finish, or color that no longer reflects your style or aesthetic preferences, consider replacing it with fresh, modern drywall to rejuvenate your space and enhance its overall appeal. Why Choose London Drywallers When it comes to replacing your drywall, choosing the right contractor is crucial to ensuring a successful outcome. London Drywallers is the ideal choice for your drywall needs for several reasons:  1. Experience and Expertise: With years of experience in the industry, London Drywallers has the knowledge, skills, and expertise to handle all aspects of drywall installation and replacement. Our team of professionals is trained to deliver high-quality results that meet or exceed your expectations. 2. Quality Materials and Workmanship: We use only the highest quality materials and techniques to ensure durable, long-lasting drywall installations. Whether you're remodeling a single room or renovating your entire home, you can trust London Drywallers to deliver superior craftsmanship and attention to detail. 3. Timely and Reliable Service: We understand the importance of completing projects on time and within budget. At London Drywallers, we pride ourselves on our ability to provide timely and reliable service, minimizing disruption to your daily life and ensuring a smooth, hassle-free experience from start to finish. 4. Competitive Pricing: We believe that quality drywall services should be accessible to homeowners of all budgets. That's why we offer competitive pricing and transparent quotes to help you achieve your home improvement goals without breaking the bank. 5. Customer Satisfaction Guaranteed: Your satisfaction is our top priority at London Drywallers. From our initial consultation to the final walkthrough, we're committed to delivering exceptional results and providing personalized service that exceeds your expectations. In conclusion, if you're experiencing any of the signs mentioned above or simply want to update the appearance of your home, it may be time to consider replacing your drywall. London Drywallers is here to help you every step of the way, providing reliable, high-quality drywall services that you can trust. Contact us today to schedule a consultation and take the first step toward transforming your space with beautiful, new drywall.
04 May, 2024
Drywall cracks can be a common issue in many homes, often caused by factors such as settling, temperature fluctuations, or improper installation. While they may seem minor at first, untreated cracks can worsen over time, leading to more significant structural issues and costly repairs. At London Drywallers, we understand the importance of addressing drywall cracks promptly to maintain the integrity and appearance of your walls. In this article, we'll discuss how you can prevent and fix drywall cracks effectively. Preventing Drywall Cracks: Proper Installation: Ensure that drywall panels are installed correctly, with adequate spacing between panels and secure attachment to the framing. Improper installation can lead to stress on the joints, increasing the likelihood of cracks. Control Moisture Levels: Moisture can weaken drywall and contribute to cracking. Maintain consistent humidity levels in your home and address any water leaks or moisture issues promptly to prevent damage to your walls. Address Structural Issues: Address any underlying structural issues in your home, such as foundation settling or framing problems, that could contribute to drywall cracks. Consult with a professional contractor if you suspect structural issues are causing cracks in your walls. Use Flexible Joint Compound: When finishing drywall seams and corners, use a flexible joint compound that can withstand minor movement without cracking. This will help minimize the risk of cracks developing over time. Install Control Joints: In larger rooms or areas with significant temperature fluctuations, consider installing control joints in the drywall. These joints allow for natural expansion and contraction of the drywall, reducing the likelihood of cracks forming. Fixing Drywall Cracks: Assess the Damage: Start by assessing the extent of the crack to determine the appropriate repair method. Small hairline cracks may only require cosmetic repairs, while larger cracks may indicate underlying structural issues that need addressing. Fill and Sand: For minor cracks, use a lightweight spackling compound to fill the crack and smooth the surface. Allow the compound to dry completely, then sand the area smooth with fine-grit sandpaper. Apply Joint Tape: For larger cracks or areas where the drywall tape has pulled away, apply self-adhesive mesh joint tape over the crack to provide additional reinforcement. Reapply Joint Compound: Apply a thin layer of joint compound over the taped area, ensuring that it blends smoothly with the surrounding wall surface. Feather the edges of the compound to create a seamless transition. Sand and Paint: Once the joint compound has dried, sand the repaired area smooth and prime it for painting. Apply matching paint to the repaired area to blend it with the surrounding wall surface. By following these prevention and repair tips, you can effectively address drywall cracks and maintain the beauty and structural integrity of your walls. If you're unsure about how to handle drywall cracks or if you need assistance with repairs, don't hesitate to contact the professionals at London Drywallers. Our experienced team can provide expert advice and quality craftsmanship to ensure your drywall is in top condition.
02 May, 2024
Drywall taping is a critical step in the drywall installation process that involves covering the joints and seams between drywall panels to create a smooth and seamless surface. Proper taping ensures that the finished walls or ceilings appear uniform and free of visible imperfections. In this guide, we'll explore what drywall taping involves and why it's essential for achieving professional-quality results. 1. Preparation: Before beginning the taping process, it's essential to prepare the drywall surfaces properly. This includes ensuring that the drywall panels are installed correctly and securely fastened to the framing. Any gaps between panels should be filled with joint compound, and any protruding screws or nails should be sunk below the surface. 2. Applying Joint Compound: Once the drywall panels are installed and the joints are filled, the next step is to apply joint compound, also known as mud, over the seams and joints. Joint compound is a thick paste-like substance that is spread over the joints using a drywall knife or trowel. The compound helps to fill in gaps and create a smooth transition between panels. 3. Embedding Drywall Tape: After applying the joint compound, drywall tape is embedded into the compound along the seams and joints. Drywall tape comes in various forms, including paper tape and self-adhesive mesh tape. The tape helps to reinforce the joints and prevent cracking or separation over time. 4. Taping and Feathering: Once the tape is in place, additional layers of joint compound are applied over the tape to cover it completely. This process is known as taping and feathering, where successive layers of compound are applied and smoothed out to create a seamless finish. The compound is feathered out beyond the edges of the tape to blend it into the surrounding drywall surface. 5. Sanding and Finishing: After the compound has dried, the taping area is sanded smooth to remove any bumps or imperfections. This step helps to achieve a uniform surface texture and prepares the drywall for painting or other finishes. Once sanded, the taping area is inspected for any remaining imperfections, which can be patched and sanded as needed. 6. Priming and Painting: Once the taping process is complete and the drywall surface is smooth and free of imperfections, it's ready for priming and painting. Priming helps to seal the drywall and create a uniform surface for paint application. After priming, the drywall can be painted with the desired color or finish to complete the project. Conclusion: Drywall taping is a crucial step in the drywall installation process that requires skill, precision, and attention to detail. By understanding the steps involved in drywall taping and working with experienced professionals like London Drywallers, you can ensure that your drywall project is completed to the highest standards. With proper taping techniques, you can achieve smooth, seamless walls and ceilings that enhance the beauty and value of your home.
29 Apr, 2024
Drywall patching is a common task for homeowners, whether it's repairing a small hole from a doorknob or fixing a larger area damaged by water or impact. With the right tools and materials, patching drywall can be a straightforward process. In this guide, we'll walk you through the steps of patching a hole in drywall and the tools and materials you'll need.  Materials Needed: Drywall Patch: Purchase a drywall patch kit or a piece of drywall slightly larger than the hole you're repairing. Drywall Compound: Also known as joint compound, this is used to fill and smooth the patched area. Drywall Tape: Mesh or paper drywall tape helps reinforce the patch and prevents cracking. Sandpaper: Use fine-grit sandpaper to smooth the patched area. Primer and Paint: Once the patch is dry, you'll need primer and paint to match the surrounding wall. Utility Knife: Used to cut away any damaged or uneven edges around the hole. Putty Knife: For applying the drywall compound and smoothing the patch. Sanding Block: Helps achieve a smooth finish on the patched area. Step 1: Prepare the Area Start by clearing the area around the hole of any loose debris or paint chips. Use a utility knife to cut away any damaged or uneven edges, creating a clean, even surface for the patch. Step 2: Apply Drywall Patch Place the drywall patch over the hole, ensuring it covers the entire damaged area. If necessary, trace around the patch with a pencil to mark its outline on the wall. Step 3: Cut the Drywall Using a utility knife, carefully cut along the outline you marked, removing the damaged drywall and creating a clean hole for the patch. Step 4: Apply Drywall Tape Cut a piece of drywall tape slightly larger than the hole and place it over the patch, pressing it firmly into the drywall compound. Step 5: Apply Drywall Compound Using a putty knife, apply a thin layer of drywall compound over the patch, covering the tape completely. Smooth the compound evenly over the patch, feathering the edges to blend with the surrounding wall. Step 6: Let it Dry Allow the first layer of drywall compound to dry completely according to the manufacturer's instructions. This typically takes 24 hours. Step 7: Sand and Repeat Once the first layer is dry, sand the patched area lightly with fine-grit sandpaper to smooth any rough spots. Apply a second coat of drywall compound, feathering the edges as before, and let it dry completely. Step 8: Sand and Finish After the second coat has dried, sand the patched area again to achieve a smooth finish. Prime the patched area and paint it to match the surrounding wall, blending the patch seamlessly into the rest of the wall. With these simple steps and the right tools and materials, you can successfully patch a hole in drywall and restore the appearance of your walls. If you're unsure or uncomfortable with tackling drywall patching yourself, don't hesitate to contact London Drywallers for professional assistance and quality repairs.
28 Apr, 2024
Drywall, also known as gypsum board or plasterboard, is a fundamental component in modern construction projects. It serves as the primary material for interior wall and ceiling surfaces, providing numerous benefits that contribute to the efficiency, affordability, and aesthetics of buildings. In this article, we'll explore why drywall is essential in construction and offer tips for finding the best drywall expert for your project in London, Ontario. Benefits of Drywall in Construction: Affordability: Drywall is a cost-effective material compared to traditional plaster. Its efficient installation process helps reduce labor costs, making it an economical choice for construction projects of all sizes. Ease of Installation: Drywall installation is relatively quick and straightforward, requiring minimal specialized equipment or skills. This efficiency helps expedite construction timelines and reduces overall project costs. Versatility: Drywall is highly versatile and can be used to create a wide range of wall and ceiling designs. It can be painted, textured, or finished with decorative treatments to achieve the desired aesthetic for any interior space. Fire Resistance: Certain types of drywall, such as fire-rated drywall, offer enhanced fire resistance, helping to contain fires and protect the structural integrity of buildings. This added safety feature is essential for commercial and residential construction projects. Sound Insulation: Drywall provides excellent sound insulation properties, helping reduce noise transmission between rooms and floors. This feature is particularly beneficial for buildings with multiple occupants or sensitive noise requirements. Durability: Drywall is durable and long-lasting when properly installed and maintained. It can withstand everyday wear and tear, making it suitable for high-traffic areas in both residential and commercial buildings. Tips for Finding the Best Drywall Expert: Experience and Expertise: Look for drywall contractors with extensive experience and expertise in the industry. Choose a company that has a proven track record of delivering high-quality workmanship and exceptional customer service. Credentials and Licensing: Verify that the drywall company holds the necessary licenses, certifications, and insurance coverage required to operate in your area. This ensures compliance with local building codes and regulations and provides peace of mind throughout the construction process. Portfolio and References: Review the contractor's portfolio of past projects to assess the quality of their workmanship and craftsmanship. Request references from previous clients and follow up to inquire about their experiences working with the contractor. Communication and Transparency: Choose a drywall expert who communicates effectively and maintains transparency throughout the project. They should be responsive to your inquiries, address any concerns promptly, and keep you informed of progress updates and potential issues. Written Contract and Pricing: Obtain a written contract outlining the scope of work, project timeline, materials used, and payment terms. Ensure that the pricing is transparent and competitive, with no hidden fees or surprises. Customer Reviews and Reputation: Research online reviews and testimonials from past clients to gauge the contractor's reputation and customer satisfaction levels. A reputable drywall company will have positive feedback and a solid reputation within the community. By understanding the benefits of drywall in construction and following these tips for finding the best drywall expert, you can ensure a successful and stress-free building project in London, Ontario. Contact London Drywallers today to learn more about our construction drywall services and how we can assist with your upcoming project.
More Posts
Share by: